
It’s common to see photographers using an on-camera speedlight when wandering around shooting at some kind of indoor function, whether it be a wedding reception or a funky nightclub.
For best results in these environments, you first need a basic understanding of flash lighting and how it differs from shooting with just continuous light. I won’t discuss those principles here any more than stating:
- flash exposure is controlled by aperture
- shutter speed controls ambient exposure
- flash enables you to freeze action
If you don’t understand what they mean, you may need to go and learn about the basic principles of flash lighting first (I recommend Lighting 101 on strobist.com)
What follows is a rundown of my process when shooting at some kind of indoor party with an on-camera speedlight.
Analyse the ambient light…
I will usually start by putting my camera on aperture priority. I’ll choose my aperture based on the depth of field I want. For most events I’ll expect to be shooting groups of people so I don’t want the depth of field to be too shallow. I’d like to try and get more than one person in focus. So I might choose f/5.6 or f/8. I could go to f/11 or f/16 but I know that will only work my flash harder so I won’t usually go that far.
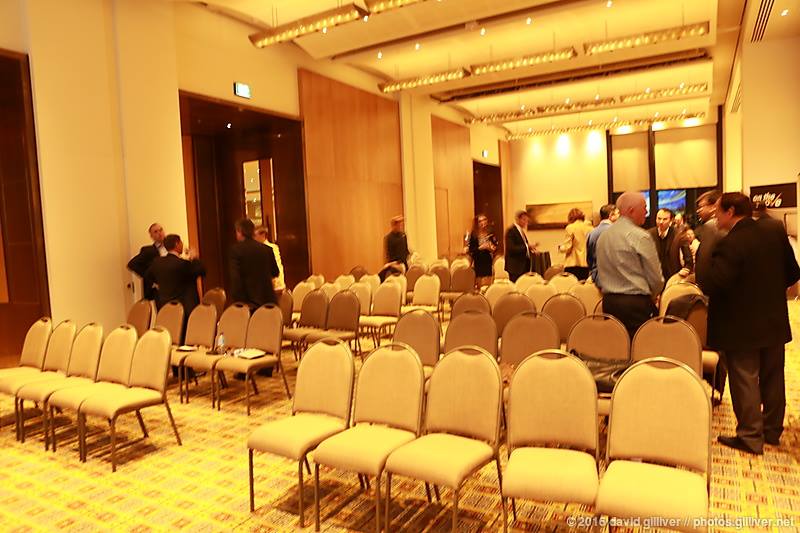
I’ll then guess a film speed (ISO) and take a test shot of the room. What shutter speed did the camera metering choose? How does it look? If the exposure looks good but the shutter speed is too slow (eg. slower than 1/30s) I will adjust my ISO to give me something faster. I might end up at 1/30s, ISO 1600, f/5.6 with the room looking okay.
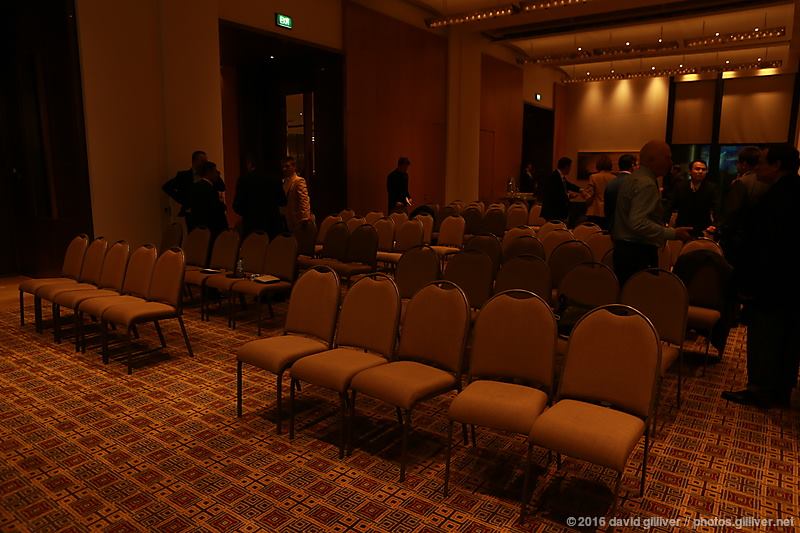
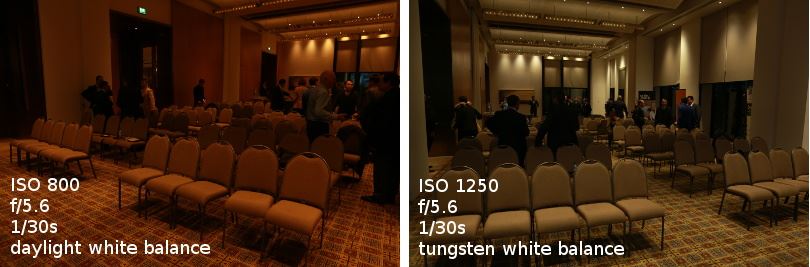
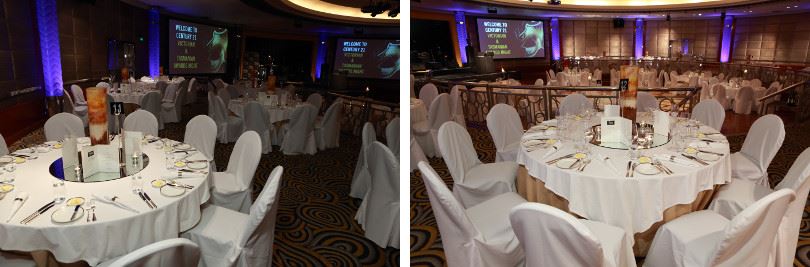
While I’m taking my test shots I’ll typically have the camera white balance dialed to daylight or flash white balance. This will help me get an idea of how the colour of the room lighting varies from the colour of the flash light. These test shots were primarily to get an exposure reading but my ultimate goal will be to have all lighting the same colour.
Gelling the flash?
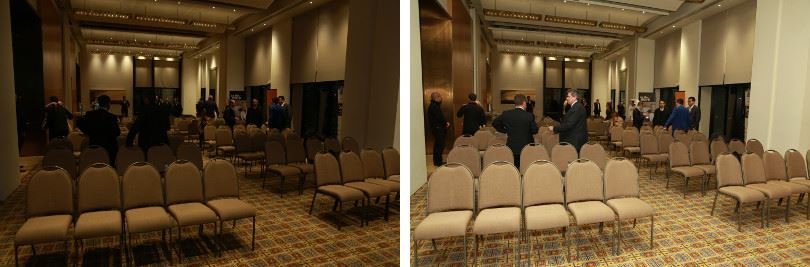
As you can see in my test shots, the room lighting appears orange because it’s used some form of tungsten or “warm” LED lighting. If the room lighting is orange compared to my speedlight, I’m going to see a colour difference depending on where each light hits, making my use of flash really obvious. I’d prefer to avoid having two differently coloured lights. What I’ll usually do is reach into my bag and grab a Honlphoto CTO (colour temperature orange) gel to put over my flash head. This should make it just as orange as the background. Now that my foreground and background have a consistent orange colour, I can then switch the camera white balance to the tungsten setting to “fix” everything. The light sources should blend together nicely.
Add the flash…
At this stage I have an understanding of the available light in the room: what kind of exposure settings I’m working with and the colour of the light. This is the light I’m going to add my flash to. It’s my starting point.
I will now put my speedlight on my camera and put it in TTL mode (ie. automatic power). As I roam around the room during the evening, I’ll have enough to worry about without trying to figure out the flash power. TTL will do it’s magic to give me the correct amount of flash power for each shot.
I will now switch to manual (M) on the camera and I will dial in the exposure settings for the room (1/30s, ISO1600, f/5.6). With these settings I should be able to get a perfect balance between what the flash does and the existing light in the room.
However, I actually care more about the people directly in front of my camera. I want them well-lit and I’m okay if the people in the background are a bit darker. So now I’ll make a decision to dial the exposure down, keeping the ambient light a little darker than the flash. This might mean changing to a shutter speed of 1/60s which will underexpose the room by 1 stop. This change will have zero impact on the flash because – as stated above – shutter speed doesn’t affect flash exposure.
Alternatively, I could underexpose by deciding to go for more depth of field at f/8, leaving the shutter speed at 1/30s. The room will still be 1 stop underexposed as intended but I will be making my flash work a bit harder to get that extra depth of field.
So now I have my two light sources where I want them. The flash will figure out the correct exposure for everything it lights by using TTL. The ambient light levels will stay slightly underexposed the flash.
I could kill more ambient light by switching my exposure to 1/200s and f/8, but this is likely to underexpose the room so much that I’m going to “lose” it. It’s going to look really obvious I’m using flash because anything not lit by flash will disappear into darkness.
There are two goals here. The obvious goal is to light my foreground subjects properly. The secondary goal is to give context by showing that they are at an event with other people. If I underexpose the ambient light too much I’ll lose that context of the room.
Potential issues…
Some may see a couple of potential problems with the approach I’ve described above. They may say that 1/30s is too slow to use when hand-holding the camera. Others might complain that the photos will start to look grainy at ISO1600 or beyond.
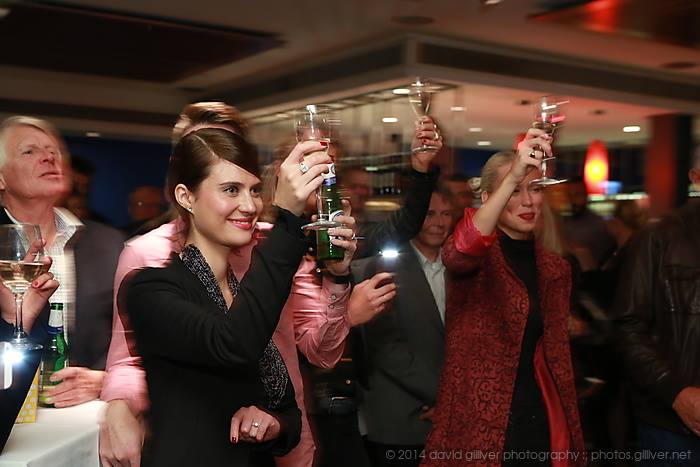
The shutter speed issue doesn’t worry me because flash freezes action. Yes, the flash is only lighting the foreground of my photo but that’s what I care about most. If there’s a slight movement in the background, it’s not going to be a big problem. If my foreground subjects move, I may get some blurring of the ambient light on them, but this will usually just add a nice sense of movement as seen in the “toast” photo here.
The choice of a high film speed like ISO1600 could be seen as a bigger issue as it increases grain in the image. However, in a room with a low level of ambient light, I don’t have a lot of choice. I can restrict myself to ISO800 but then I have to make sacrifices elsewhere. I could risk camera shake with a slower shutter speed or I could get a shallower depth of field with a larger aperture. Alternatively, I could just leave those and let ISO800 underexpose the ambient light further but then the nice quality of my ambient/flash balance starts to fall apart. When it comes down to a choice between grain and good quality lighting, I’ll go with quality lighting every time.
Another approach…
Another way of achieving the “flash + underexposed ambient” look is to use aperture priority instead of manual (M). You can then use normal exposure compensation to set the exposure level for the ambient light. If you set it to -1 or -2 the camera should keep the ambient light levels underexposed by 1 or 2 stops respectively. On most cameras, exposure compensation won’t affect the TTL metering of the flash as that’s controlled by the separate flash exposure compensation setting.
Using this aperture priority technique requires some confidence in how the camera will meter each shot. If the room light is consistent, this may add some undesirable unpredictability to a situation that could be more easily handled in manual mode.
Using flash modifiers…
In a separate note, I’ve previously talked about the use of diffuser caps and gimmicks like the Gary Fong Lightsphere. I won’t talk about that here except to repeat that you should only use those modifiers if they makes sense in that space. It’s always important to understand what exactly your modifiers do to the light. If the room is large with black walls and black ceiling, they’re going to be fairly pointless.
I normally use a Lumiquest Pocketbouncer with my speedlight pointed directly up. This is basically a large bounce card so if you have a white ceiling to bounce off, it’s good for splitting your light into two: key light bounced off the ceiling, fill light direct off the bounce card. Unlike the Lightsphere, it will keep the light mostly going forward instead of just spraying it everywhere.
If you don’t have a ceiling to bounce off, the Pocketbouncer is still useful because you can adjust the angle of it so that the light only bounces forward. The bounce surface isn’t much bigger than the bare speedlight so it won’t soften the light much but the light will be coming from a slightly higher point than with the flash head pointed forward. This will further reduce the risk of red-eye which is caused by having the flash and lens close together.
I don’t own one but another option might be to use a Rogue Flashbender. This achieves the same thing in terms of being able to be flattened to act as a bounce card or curved to only direct light forward. It’s probably easier to use than a Pocketbouncer and I’d happily use one if I owned one.
[edit: I bought a Flashbender after writing this and yes, it’s now my preferred modifier for event photography]
Off-camera flash?
Some kind of off-camera flash setup might seem like an option for event shooting but it’s usually impractical. Walking around with a camera in one hand and flash gear in the other is getting bit cumbersome and in a packed space it may not work at all. The moment you put a light stand on the floor, you’ve placed an obstacle for guests to navigate around, trip over or knock over. You also have to solve the extra problem of triggering the remote flash.
I have occasionally handheld my flash off to the side with a TTL cable connecting it back to the camera. This gives me a little flexibility with light placement but then I lose the ability to easily turn the zoom ring with my left hand. Putting the flash back on-camera lets me concentrate on more important tasks, like posing a group and yelling “cheese!”
Finally…
Direct on-camera flash is ugly because you rarely see someone lit from that direction in real life. In a dark space where we want to show faces, we don’t have a lot of choice but to use flash. We then need to do the best we can to disguise our use of flash. If we can blend the flash and ambient together properly, hopefully we’ll be able to make the photo look well-lit rather than just flash-lit.
Summary:
- figure out the exposure for the ambient light
- check the colour of the ambient and add a gel to your flash to match it
- set camera to manual and underexpose the ambient light by 1-2 stops
- add the flash on TTL
If you’ve found the above rant useful, you may like to sign up to one of my regular outdoor lighting workshops that I run in the Melbourne CBD. I run those through my meetup.com group Melbourne Photography Education.