
In terms of gear, there aren’t a lot of new ideas in photography. Sure, certain gadgets or techniques may go in and out of fashion but it’s rare to find a piece of gear that does something radically different to light. This can mostly be blamed on the physics of light being a reliably constant thing.
The idea of a ring light isn’t new, nor is the idea of a silver/white reflector. David Hobby probably wasn’t the first to come up with the combined idea of a ring reflector (Jerry Ghionis sells one as the Omega reflector) but one of his posts on his strobist.com lighting blog was the first time I’d seen it. It made me stop and think “now that’s a good idea!”. There’s always something appealing about an idea that’s simple, effective and a little bit ingenious.
The idea is pretty simple: a big reflector with a hole in the middle to shoot through. Unlike a conventional reflector which might be placed to one side of your subject to provide fill light, this reflects light from every direction around the lens position. It’s obviously pretty useless if you don’t have a decent amount of light to work with but David’s use of it to reflect sunset light back into a face produced gorgeous results. I had to make one myself.
Like in the Strobist post, my first version of this idea used a single white corflute board. These plastic cardboard sheets can be purchased at Bunnings and I was already using some as studio reflectors. They’re cheap and more durable than styrofoam.
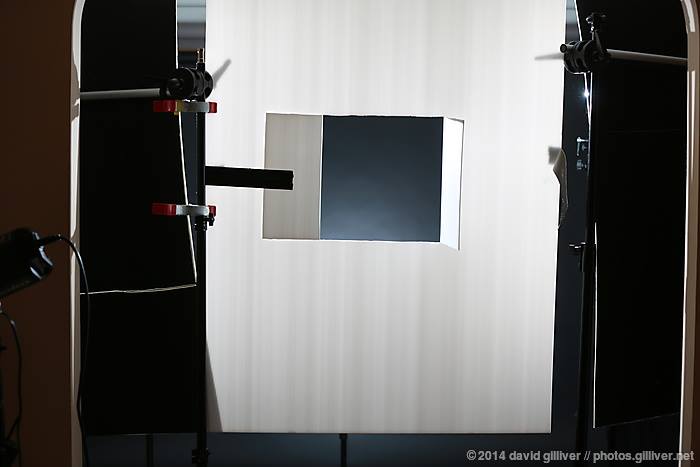
The first headache was figuring out a suitable size to cut the hole. I started with a relatively small hole, figuring that would leave the largest area of board to act as reflector. I knew that I could easily make it bigger later if it was too small (making a big hole smaller was going to be trickier). As I wasn’t yet willing to fully commit to the idea, I cut the hole as a two-door window, folding the “doors” back to open but knowing I could always close them again if I wanted to use this as a more conventional white reflector.
As I wanted to play with the idea in the studio, I then had to figure out what light source/s would reflect off the board. I settled on using 2 speedlights on stands on either side of my model, aimed at the board. Remembering a Strobist trick for evenly lighting a surface, I aimed each light at the opposite side of the board (eg. the left speedlight aimed at the right edge of the board and vice versa). This posed an immediate problem: pointing the speedlight across in front of the model risked spraying light directly onto them. I addressed this by placing a Honlphoto gobo card on the side of each speedlight to block the sideways spray towards the model.
With a single board, you have a few issues. While the speedlights are aimed at the board, they are also aimed towards your camera position. If you step back too far, the speedlights can throw light directly at the camera and you start to get lens flare. Similarly, stepping in too close and sticking the lens through the hole will also cause lens flare. Depending on where you’ve placed the speedlights, there should be some shooting zone where the white board neatly blocks direct visibility of the speedlights.
Your next issue might be that in that shooting zone, you’re getting a rather limited view of your subject because the hole is too small. You can cut the hole bigger but then you’re reducing the amount of light reflection bouncing off the boards. I began to cut the hole a little larger as I needed.
I started setting up additional boards left and right of the reflector board to give me a U-shape with the subject inside. This gave me more reflected light bouncing around but it also meant I could stand further back and not worry about lens flare. All I could see on the other side of the boards was what was visible through the hole in the middle. If I decided I wanted a harsher light without quite so much reflection, I could simply flip the extra boards over to use the sides I’d previously painted matte black. This way they acted as gobos only.
This setup worked pretty well. I felt the shots I was creating looked way more expensive than my very lo-fi lighting setup of 2nd hand speedlights and plastic boards.
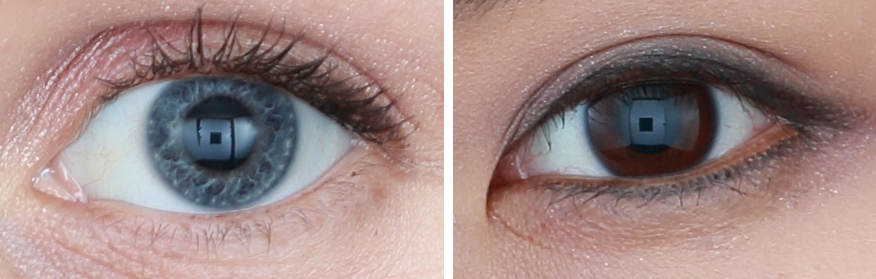
One issue that some people (usually photographers) complain about with ring lights is the unusual catchlight in the eyes. With a normal ring light you simply get a ring catchlight and with LED lights made of a series of small lights arranged in a ring, you get a dotted circle of a catchlight. With my 3 boards, I was getting a strange square-hole catchlight plus extra white bits either side. I attempted to deal with this by overlapping the boards to remove the black stripes but I wasn’t entirely happy with it.
I now decided it was time for a new version of the ring reflector using 2 white boards taped together like a v-flat. This enabled me to increase the size of the hole without being too concerned about eating into the much-larger reflective area. As my boards weren’t particularly tall I had to do some experimenting with some reflector-holding arms to find the best way of supporting this more unwieldy setup.
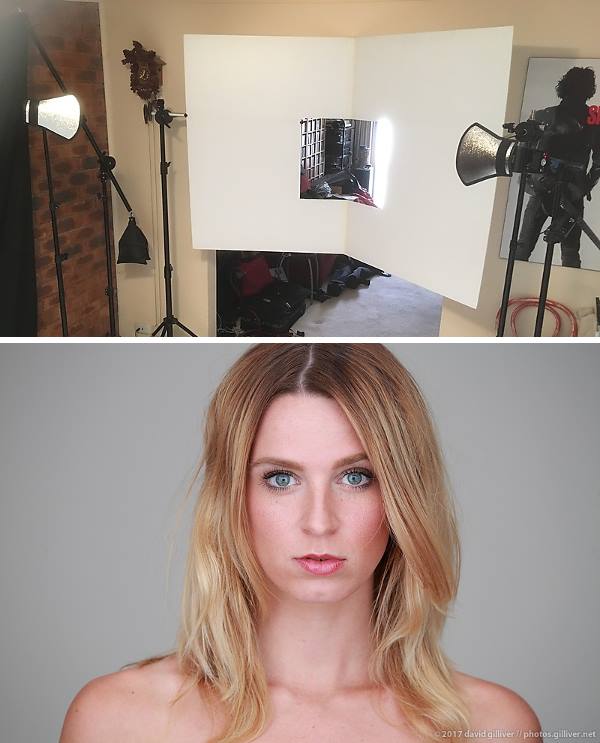
Using speedlights for this gives you smaller lights to hide from the camera position but it also lets you dial the power down reasonably low to work with a shallower depth of field, as with the shot below. This may be difficult with larger studio strobes without adding modifiers to bring the brightness down.

Shooting through the hole will make it difficult to shoot longer length portraits. If you push the model back far enough to see their full length through the hole you have to deal with the lower light levels at that distance. I mostly shoot headshots and head/torso shots with it.
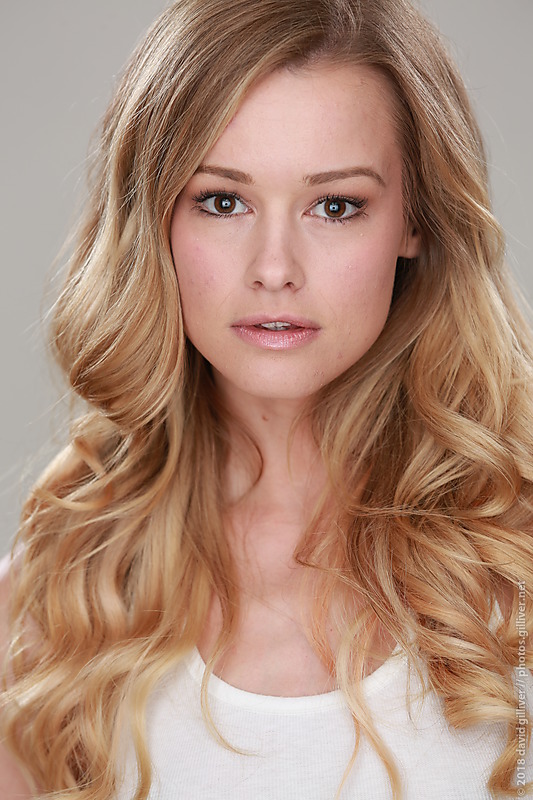
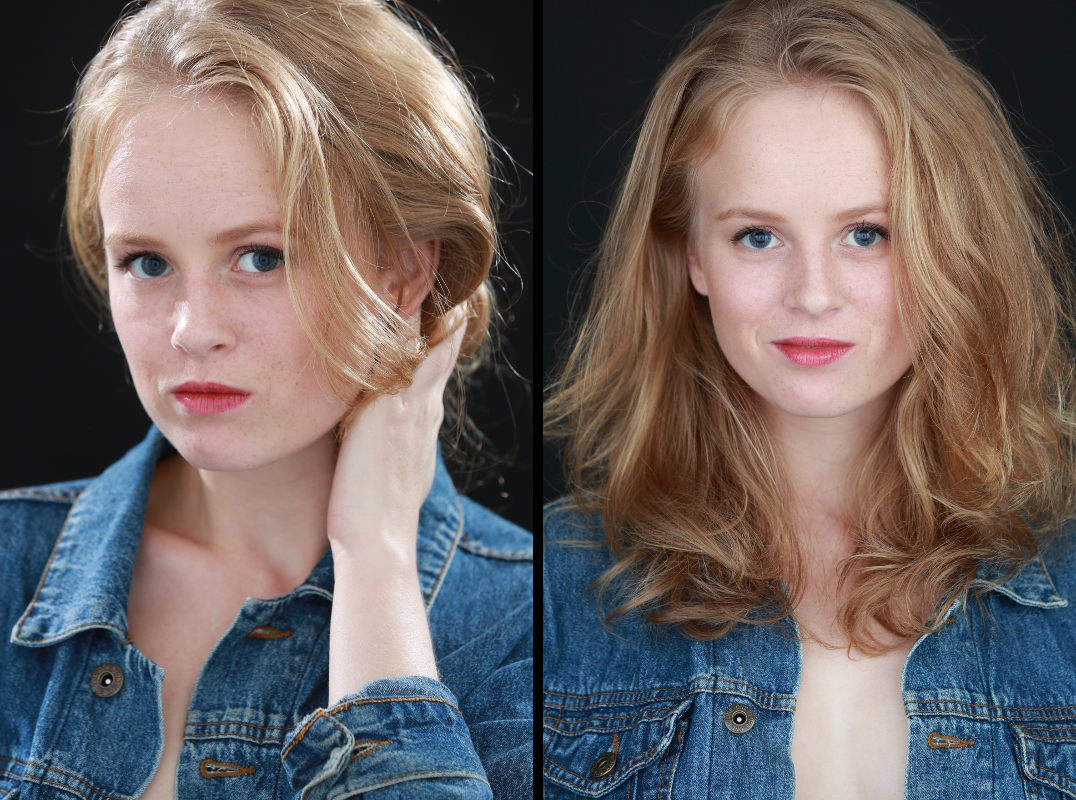
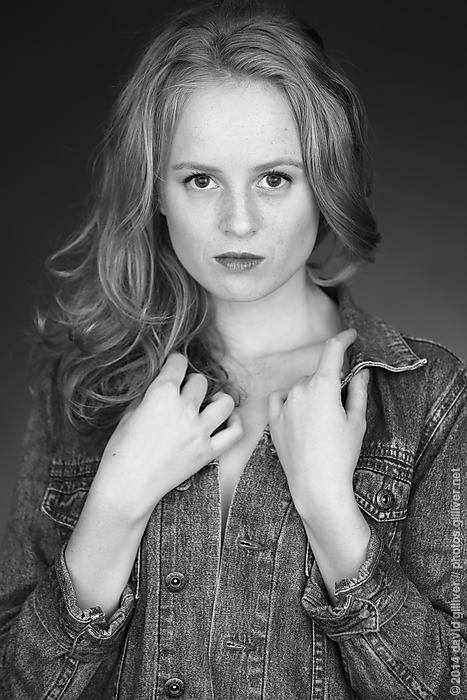
Generally speaking, the light from this setup is flattering because it’s very large and soft, removing shadows that might show skin imperfections. The shadows fall directly backward and highlight the contours of the face. It’s ideal for lighting people with dark skin tones as it provides a large and even specular highlight across the face.

This on-axis lighting setup is often my go-to first lighting setup on a portrait shoot. It’s not particularly difficult to setup, it mostly obliterates any skin imperfections and it just looks cool. My models might raise an eyebrow when they first see it but they love the look of the shots. I can add extra lights to act as rim/hair lights and to light the background but it usually looks great by itself.
If you’ve found the above rant useful, you may like to sign up to one of my regular outdoor lighting workshops that I run in the Melbourne CBD. I run those through my meetup.com group Melbourne Photography Education.